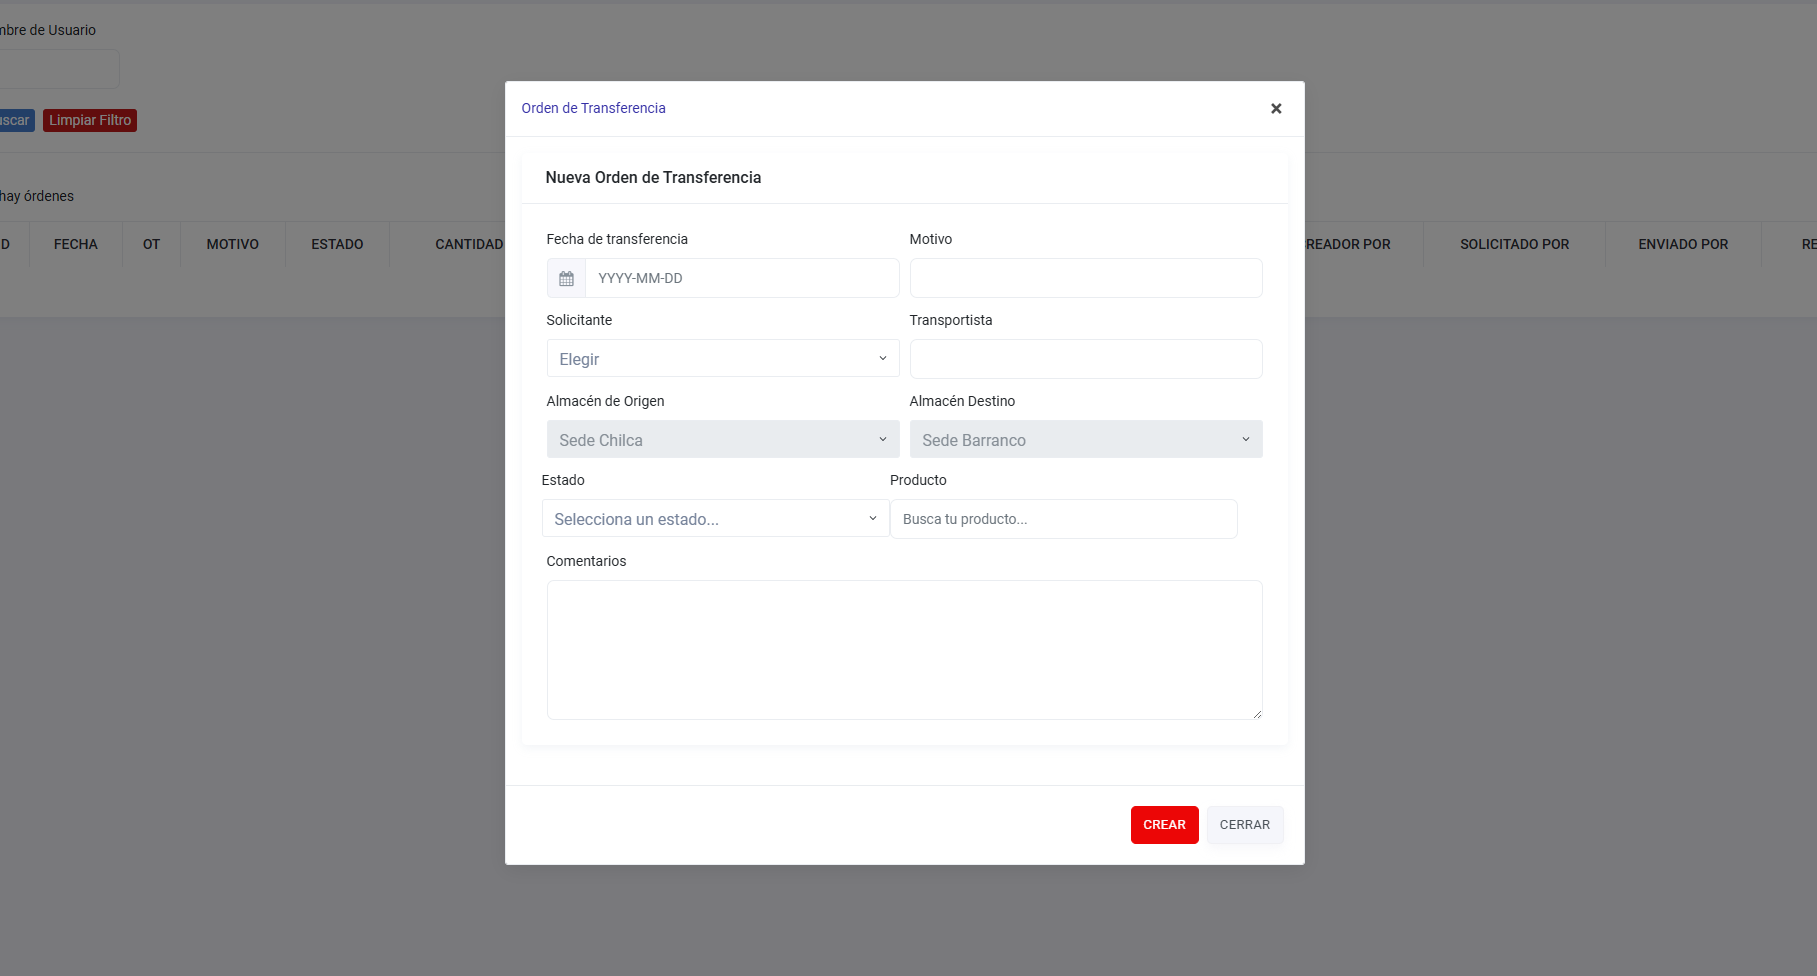
The system allows you to place orders that move a certain amount of products to other destinations, whether they are other warehouses or cities. The purpose of this manual is to guide the process of creating both shipping orders and transfer orders.
1, Product Selection:
Before moving directly to the explanation of transfer and shipping orders, it is important to highlight the way in which the products are selected.

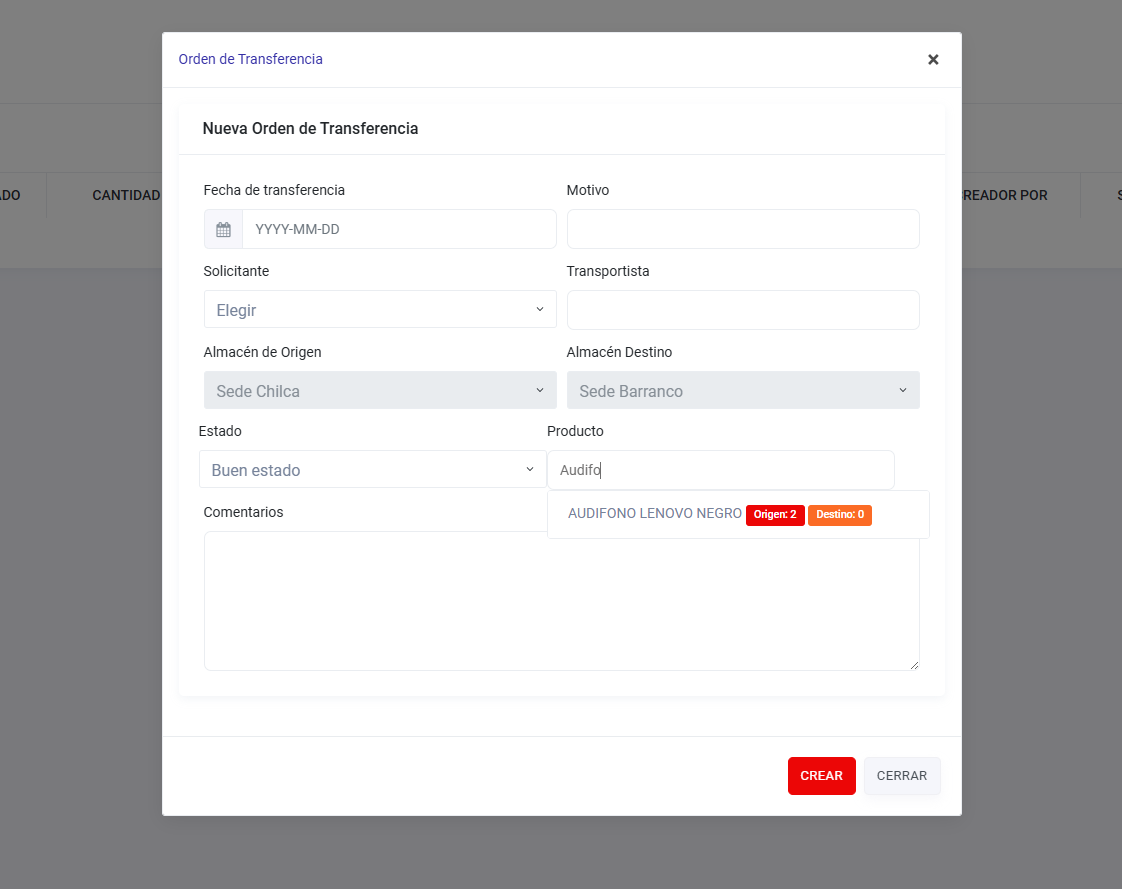
First, you must select a source warehouse and a destination warehouse. This only applies to transfer orders, since only one origin warehouse will be selected in the Shipping Orders.
Once this has been selected, two boxes will appear just below that will be waiting for the status of the product you want to choose (Good Condition, Bad Condition, Deteriorated Condition), and from this selection you will be able to choose the product you are looking for.

It should be noted that there is a minimum of 6 characters before the list of products begins to appear at the bottom. The quantity of products present in that origin and destination warehouse will be indicated there with the status that you have selected.

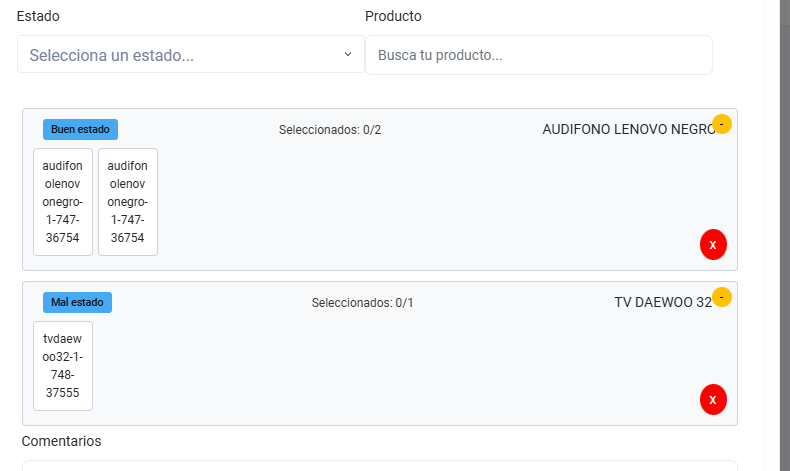
If you want to add another product, you simply have to choose the status and name of the product again. If you do not want to choose item by item, you can click on the upper central part where the 0/2 is located, there you can manually write the quantity you want to choose, you can also delete the product selection by clicking on the red button , and you can minimize the product tab by clicking on the yellow button. It should be noted that what is shown in the small boxes is the sku or barcode of the item, in case you wish to choose more carefully.
This would end the product and item selection process.
IMPORTANT: TO SELECT PRODUCTS, IT IS MANDATORY TO SELECT THE PRODUCT FROM THE DROP-DOWN DOWN THAT COMES FROM THE NAME, IF NO DROP-DOWN DOWN APPEARS, THIS MEANS THAT THERE IS NO PRODUCT REGISTERED WITH THAT NAME, WAREHOUSE OF ORIGIN OR STATE.
2. Transfer Orders:
Transfer orders only need to be registered and approved. You must select a transfer date, the reason for this transfer, the requester, the carrier and then the origin and destination warehouses. Once the new transfer order is created, the system automatically sends an email to all those in charge of the selected destination warehouse. For this process to come to an end, the manager of the destination warehouse must approve the transfer order, thus affirming that he has received the delivery of products. Likewise, the creator of the OT can cancel the order, but not before leaving a reason why the order is being canceled. These options can be seen both in the Transfer Orders table, specifically in the Actions column, as well as in the Transfer Orders detail, where the selected Order can be exported to Excel, and this order can be approved or canceled .
3. Shipping Orders:
Shipping orders are structured in the following phases:
. Accounts Phase:
The creation of the Shipping Order is part of the Accounts Team. Applicants are responsible for entering the client, type of requirement, name of the project, the province where the shipment of products will be executed, the approved budget, uploading a file that the operations team can then download, attention to the requirement and finally, some optional comments. An email will automatically be sent to all warehouse managers once the shipping order has been generated.
. Operations Phase:
Once the Shipping Order has been created, the Operations Team will be in charge of selecting the origin warehouse from which the products to be sent will be taken, then they will specify the carrier, the date of service, the shipping cost, and then Four files will be allowed to be uploaded in a non-mandatory manner (Submission Guide, Remittos, Signed Guide, Report). Finally, the operations team will move on to product selection as explained before. It should be noted that, if the order has Lima as its province, then an email will reach all those in charge of a warehouse, however, if the province that was chosen for this order is not Lima, then an email will reach all the warehouse managers. users who are registered as “Supervisors”.
. During Operations Phase:
Once the Operations team has carried out the previous steps, the shipping order will go to the status of “In Process”, while the shipping order is in process, the 3 files mentioned above can be uploaded such as Remittance Guide, Remittos and Report. During this entire process, new files can be uploaded that will replace those that have been uploaded before. However, the signed guide will be the last file that can be uploaded before the shipping order goes to “Finished” status. If the shipping order has “Lima” as the Province, then the option to upload the signed guide and approve the shipping order will only be visible to the Operations team or to all those who are in charge of a warehouse, however, if The province of the order has something other than Lima, then the option will only be visible to the supervisors, and these will be the only ones who can send the signed guide and approve the shipping order.
. Ending:
Once the shipping order is completed, the actions will be disabled and the order will go to the “Finished” status.

Anthony Jossue Ramirez Flores
Member of DataServicios, a company specialized in the development of applications for the Android platform and web applications with PHP, Laravel, and Zend Framework.
View All Posts >

No comments yet. Be the first to comment!